Frugal Bird Feeder Plans are so easy to make yourself using items around the house.
This post will show you how to make your own bird feeder and house using an old empty coffee container and a couple of other things you likely have sitting around the house.
Spring has arrived and this frugal project is just perfect for all of the birds that have been visiting my backyard lately.
I just love any chance that I can reuse something that would otherwise get thrown into the trash.
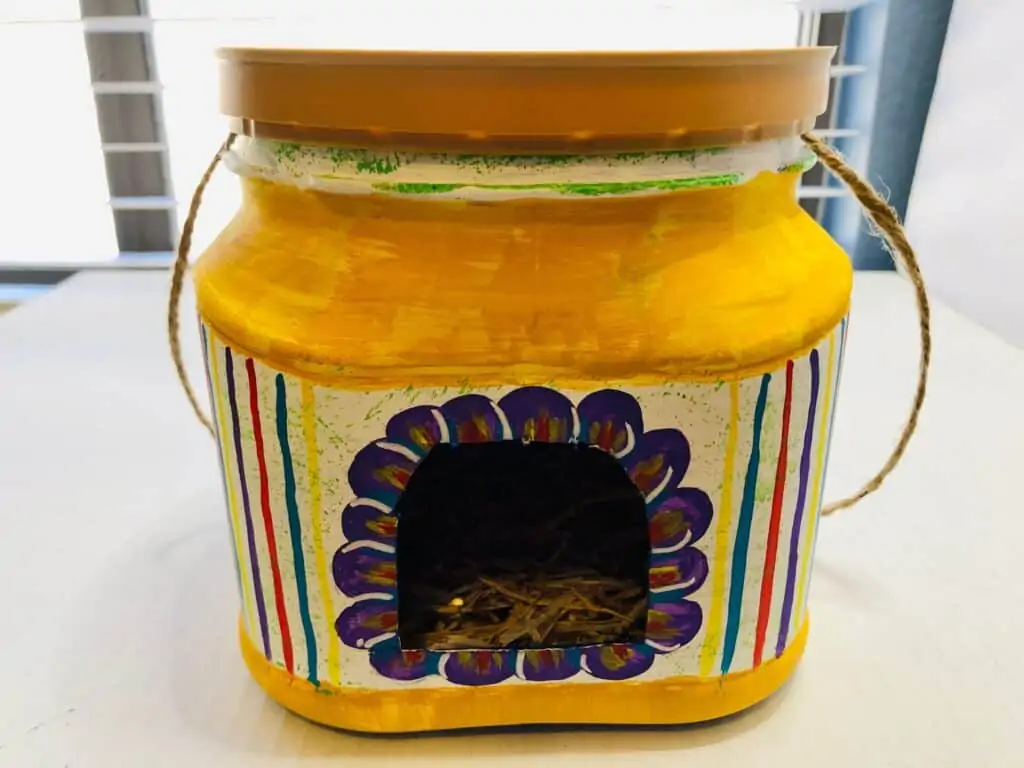
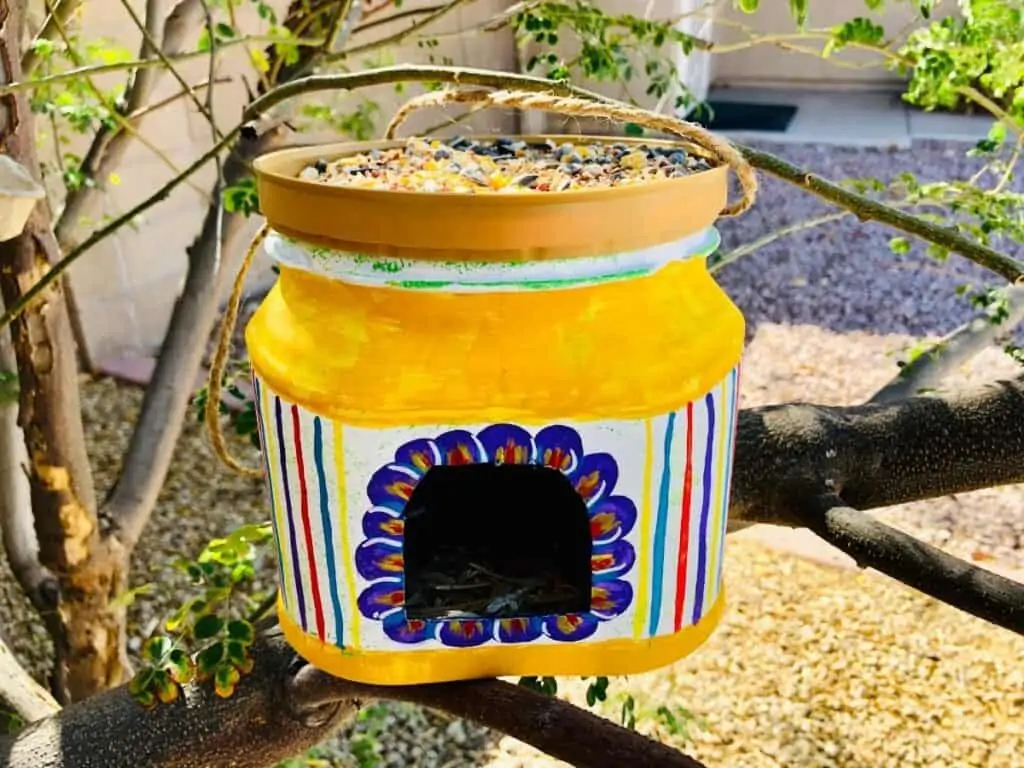
This birdhouse feeder is a great way to recycle an empty coffee container into something useful again.
Bird Feeder DIY
This is a frugal project for any do-it-yourselfer that loves crafts and wants to save money.
There is a satisfaction that comes from making something yourself out of free materials that you would otherwise just throw away.
Homemade bird feeders are so fun to make, and this easy tutorial has a simple design and step-by-step instructions to walk you through each part of the process.
Your neighborhood feathered friends will love this beautiful bird feeder and you will love the feeling your get from making this simple project yourself.
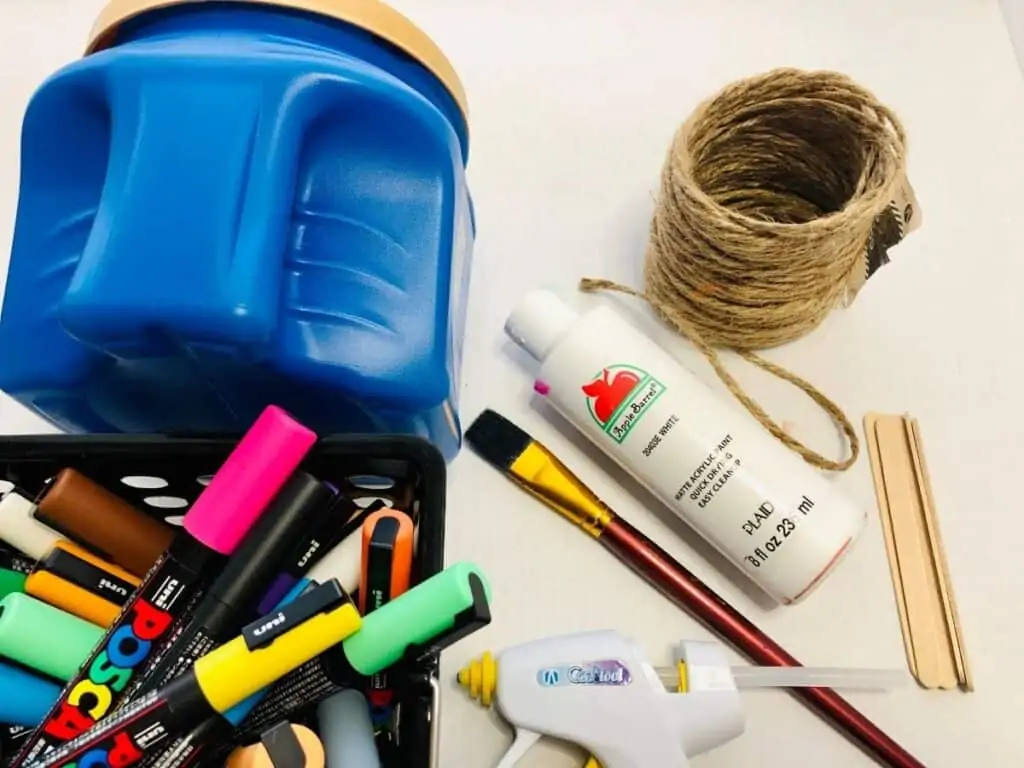
Supplies Needed to Make a Bird Feeder House
- Empty coffee container
- Paint and paintbrushes
- Jute cord
- Hot glue
- Natural nesting material
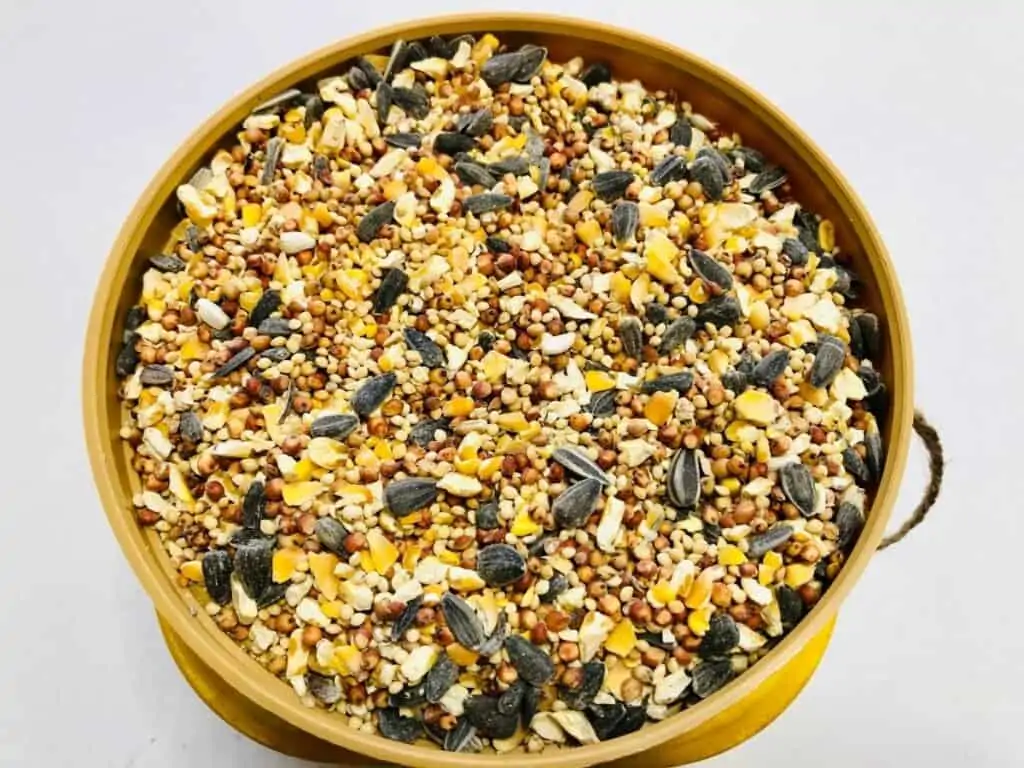
- Bird seed
- Sharp Knife
How to Make a Bird Feeder Station
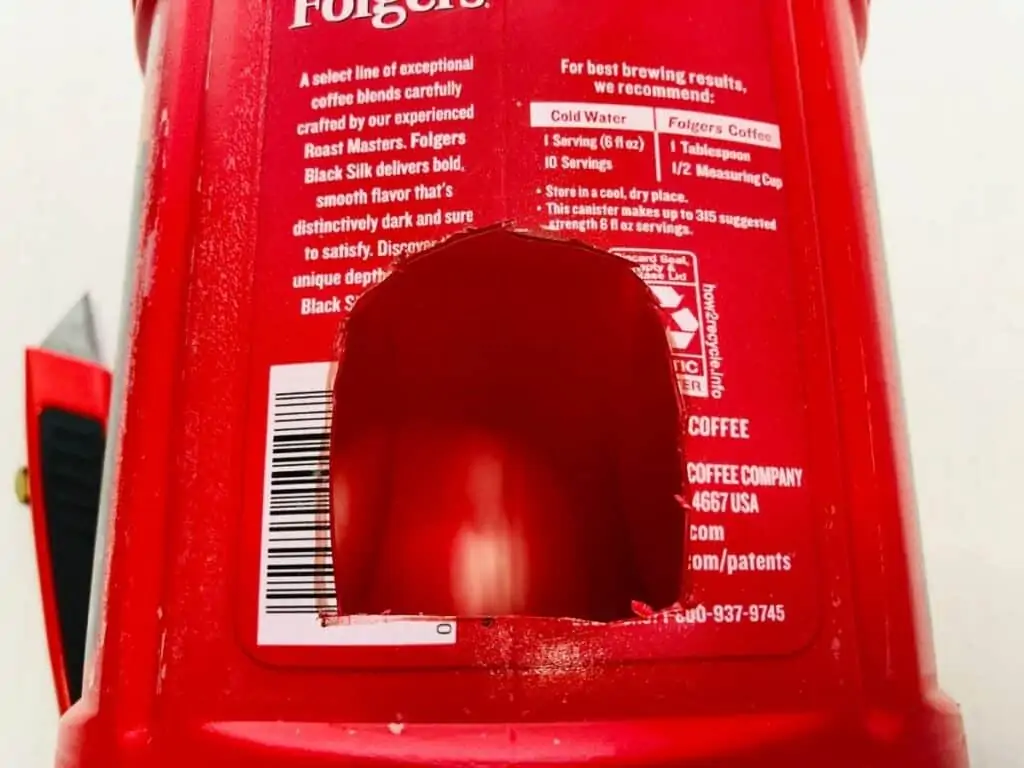
Step 1: Make sure that your empty coffee container has been washed and thoroughly dried before starting this easy DIY project.
Step 2: Carefully cut out an opening to allow the birds to go inside what will be the birdhouse area.
Step 3: Paint the container with a solid coat of white paint and allow it to dry completely.
This will give you a nice blank canvas to paint any designs you want on top of the white background.
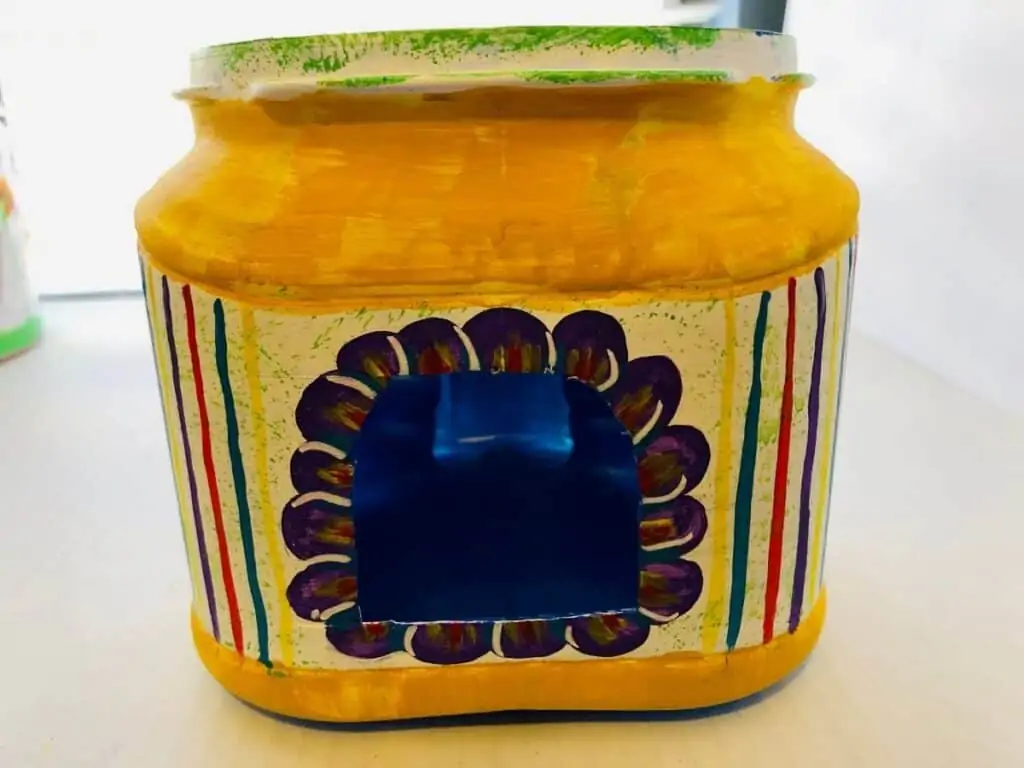
Step 4: Now use any other colors of paint that you like to create any desired theme or design.
Step 5: Allow to dry completely before moving on to the next step in the tutorial.
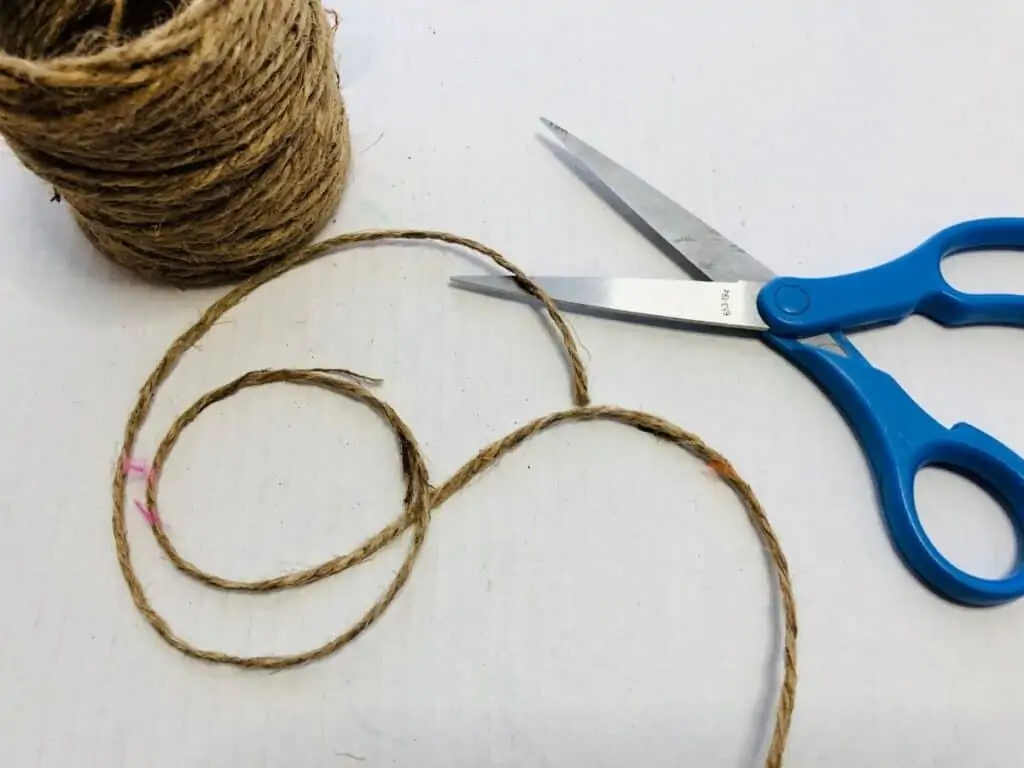
Step 6: Cut a section of jute cord string to be used for the hanger and glue to either side of the top of the container using hot glue.
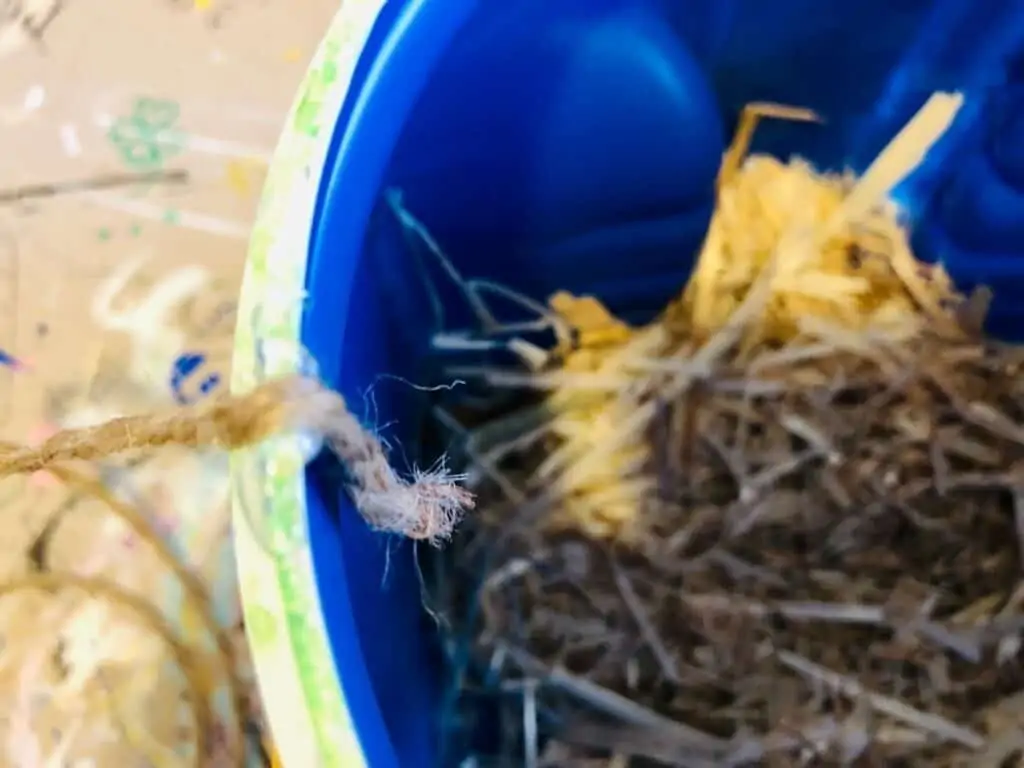
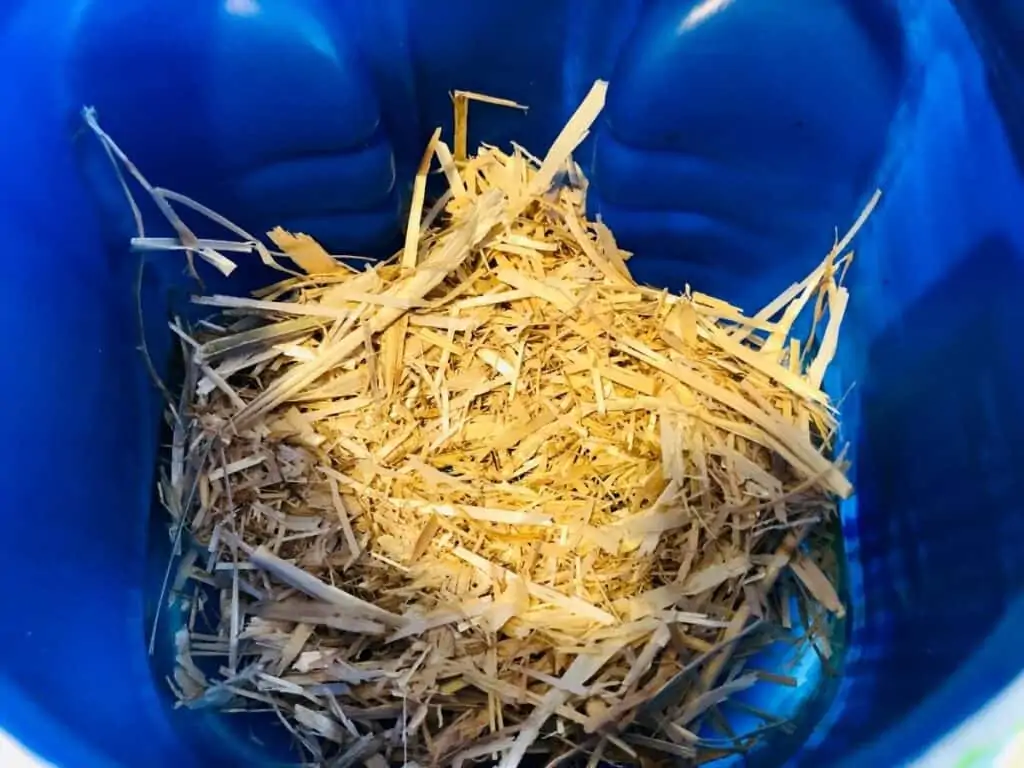
Step 7: Place a small amount of nesting material in the bottom of the container for the birds.
Expert Tip: The nesting materials can be just about anything you have on hand such as hay, moss, or dry leaves.
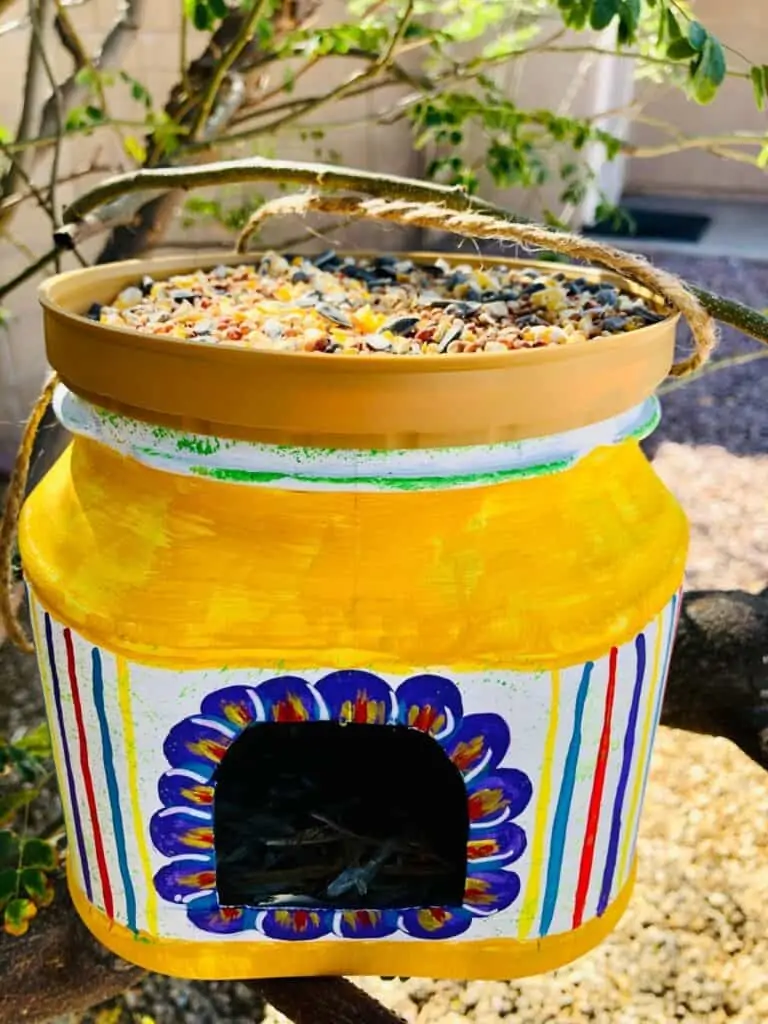
Step 8: Glue the container lid, upside down on the top of the container.
This upside-down lid will now be used as a feeding tray that you will be able to set birdseed in for the birds to eat while perching on the platform.
Make sure that you have completely secured the lid with the hot glue before moving on to the next step.
Step 9: Pour bird food or bird seed onto the feeding tray.
Step 10: Hang your brand new outdoors and watch the birds enjoy!
If you enjoy bird watching as I do, you are sure to see lots of birds with this bird feeder idea.
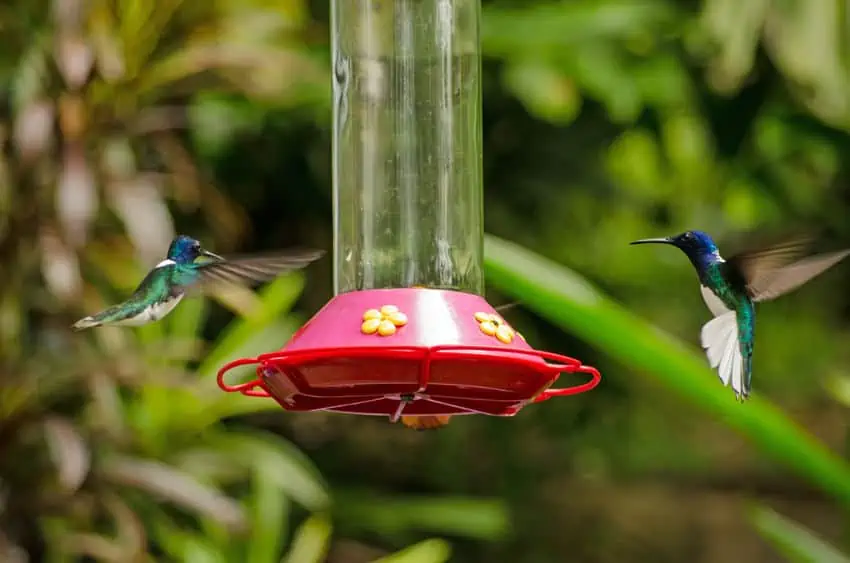
You might also like this Homemade Hummingbird Food Recipe if you want to attract hundreds of hummingbirds to your yard.
This is a super frugal recipe and uses just two common household ingredients.
I hope you have found this frugal DIY project easy and fun to make.
I would LOVE to see pics of your bird feeder station. Feel free to share them in our private Facebook Group here.
More Garden DIY Projects
If you loved this DIY project, you’ll love these ones too:
- Birdseed Ornaments – I just love feeding the birds in my yard all year long. These hanging bird seed ornaments are such an easy way to do so, especially if you do not have a lot of room for a bird feeder.
- Upcycled Birdfeeder – Easy DIY birdfeeder using an empty mouthwash container.
- Teepee Trellis – This Kids Garden Teepee Trellis is one of the best ways to get your kiddos involved in the love of gardening. Your kids will love playing in this Sweet Pea Teepee.
- Bee House – These are a great addition to any garden.


